Construction Basics
The remainder of this blog details the construction of the platform in case someone wants to build one like it, or just get ideas. This post is a general overview of the construction process; subsequent posts provide detail on various subsystems.
One of the more challenging aspects of this project was sourcing all the various components: the motor and drive components, electronics, connectors, bearings, and so on. Most of it came from Amazon but for some of it I could not find anything suitable or found it substantially cheaper elsewhere. The design spreadsheet, on the 'Bill of Materials' tab, has a detailed list with most of the items. When I was doing my research I found that links to products are not very durable (404 anyone?) and so I've tried to describe things in enough detail that you can find them even if the links don't work.
Some of the items are just stuff I had lying around or are easily located at your local hardware store. I've found that true hardware stores (Ace, True Value) have better selection that the big boxes like Home Depot, Lowes).
Even though I'm in the USA I used metric measurements for everything. I find it to be much easier. You will need a metric tape measure and ruler. I also used metric-sized hardware, so you will need a set of metric drill bits.
The plywood is the Baltic birch variety, which is plywood made from solid hardwood with no voids and a nice surface. One of its advantages is that unlike normal plywood, the edges can be rounded over and finish nicely. You could certainly use regular cabinet-grade plywood but the aesthetics might not be as nice. I would definitely not suggest using construction-grade plywood.
I used maple for the tracking surface mainly due to its hardness, so it would not be worn by the steel bearings. Also it looks great when sanded and finished.
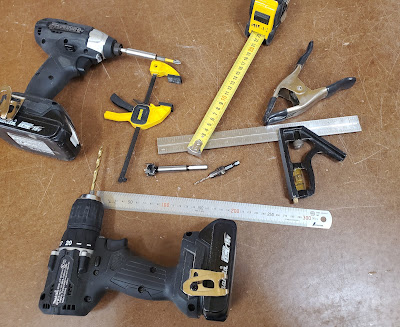
These are some of the tools I employed. Probably none of them are absolutely essential. If you lack any of these you may be able to improvise.
- Table saw - for cutting the plywood, cutting bevels, and making the conical circular segment surface.
- Band saw or jigsaw - for roughing out the circular segment.
- Miter saw or radial arm saw for making crosscuts and miters.
- Disc blade - or disc sander - for making the final conical circular segment surface.
- Drill press - not essential but very handy - for making holes perpendicular, concentric, or consistent from piece to piece.
- Forstner bits - for making nice clean holes in the plywood.
- Pilot hole bits and countersink bits - for screws.
- Trim router and round-over bits - for the corners and edges.
- Clamps - for holding stuff in position as it's assembled.
- Basic woodworking tools: drill, impact driver, squares.
 |
| Some of the essentials |
You'll need basic woodworking skills like the ability to make accurate cuts, drill holes, basic clamping and gluing, and rounding edges.
A note on the angles: there are a handful of bevel cuts (to form an angled edge) and miter cuts (an angled crosscut). All of them are at the same angle, which is the complement of the platform's inclination (for example, for my 40° platform all the angle cuts were 50°). I found it useful to set up an adjustable square at the correct angle and then use it to align the saws.
Before I built the platform shown in these pictures, I built a prototype, in order to develop and practice the process. This was very useful. I tested it with the telescope and it performed well. The prototype is for sale, without the drive, for the cost of the materials. Contact me if you are interested.
The general process was:
- Finalize the design
- Cut the circular segment
- Cut the platform, base, and supports
- Assemble the tilting platform
- Build the bearing blocks
- Assemble the base and south bearing
- Construct the drive base and engagement mechanism
- Build the laser alignment tube and socket
- Take everything apart
- Angle the sides of the platform and base
- Round all the corners and edges
- Sand and finish all the parts
- Re-assemble everything
In parallel, I worked on the electronics, namely:
- Prototype the circuit
- Write the Arduino sketch
- Solder the circuit board
- Build the hand controller

Comments
Post a Comment